GoPro HERO12 & HERO11 for Skydiving
Posted by Mark Kirschenbaum on
The GoPro HERO12 works well out of the box, but there are some critical settings I would change before using it in freefall.
General Advice
- Format your card regularly. Do not delete files off of the card, especially if it's over 64GB. If you start having failures, your card is most likely the culprit. Personally, I throw out cards if they fail more than once after a format.
- Only use recommended cards from an known good vendor!
It's worth spend a few extra dollars to prevent video failures.
Do not ignore the slow speed card warning on your camera! - Only use GoPro Batteries The second most common issue is from using poor quality, third party batteries. Only use the white GoPro Enduro batteries.
- Keep your camera out of direct sunlight in the summer (ex. on the mockup), and away from the cold part of the door, in the winter. Just like your cellphone, extreme heat, or cold, will cause the camera to malfunction. Protect it!
- Keep your camera updated with the latest firmware. The GoPro Quik app automatically checks this each time it connects.
- Practice turning the camera on and off on the ground. The sky and under canopy is not the place to learn how to operate the camera. If you wear gloves, practice while wearing gloves. Get used to the sounds the camera makes when it starts and stops recording and when there is a failure such as a card missing.
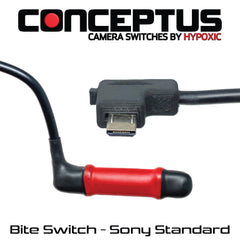
- Using a system like our BLU2Pro or BLU2Lite helps ensures you never miss the shot!

Mounting
WARNING If you use a GoPro VHB Mount It takes 24+ hours to fully cure! Be sure to fully clean the surface and apply it in a warm environment.
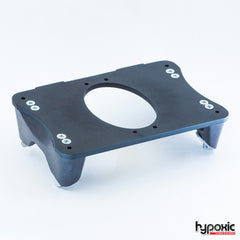
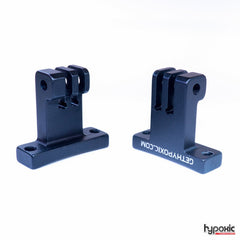
We recommend using a third party mount. The Cookie G35 with the utility plate and a roller mount is a great solution! Avoid magnetic mounts!
General Settings
Theses are settings I recommend most skydivers use. Of course, there are special cases, but this is a good generic start. I set this up using the Quik App, but it's fairly easy to setup on the camera.
To setup through the camera toggle through all the menus to find these various settings.
(H12) GoPro HERO12 Black
(H11) GoPro HERO11 Black & GoPro HERO11 Mini
| Typical | Highest Quality and Fast Computer | Notes | |
| Controls | Pro | Pro | |
| Bit Rate (H12) | Standard | High | More data per frame |
| Video Mode (H11) | Highest Quality | Highest Quality | Opens up more settings |
| Bit Depth (H12) | 8-Bit | 10-bit | More color information per pixel |
| Max Lens Mod | None | None | Need the MAX lens. It's is nice for capturing exits but too wide for most everything else IMHO. |
| Anti-Flicker | 60hz US/ 50Hz Europe | 60hz US/ 50Hz Europe | Reduces flicker when in a room with florescent lights |
| QuickCapture | On | On | One button start |
| Auto Off | 5 min | 5 min | 5 minute or 1 minute. If turn your camera on standby, this is how quickly it will turn itself off. |
| Default Preset | Last used video | Last used video | Set to Time Lapse if you shoot continuous photos. |
| Beeps | High | High | A must for skydivers so you hear it in a loud plane |
| LED | All On | All On | |
| WiFi Band | 5Ghz | 5Ghz | |
| LCD Brightness | 30% | 30% | As low as you can but still see for power saving. |
| Orientation | Locked | Locked | Ensure the camera is oriented the way you want it before locking orientation. |
| GPS (H11) | Off | Off | Save power |
| Voice Control | Off | Off | Save power |
| Auto Lock | On | On | A Must for Skydivers. Set Last if setting these on the Camera. |
| Screen Saver Rear | 1min | 1min | |
| Screen Saver Front | 1 min | 1 min | |
| Front Screen Options | Your Call | Status Only |
Status Only saves some power. Off is better but confuses people checking your camera. Full View is nice if you take selfies.
|
Video Presets
We can't recommend a setting without knowing how to footage will be watched or published. If you are just watching on your phone, there is really no point to shoot at the highest quality. High quality footage uses a ton of space, drains the battery quicker, and takes longer to transfer. If you are publishing the footage on YouTube, selling it, or planning on cropping the image, shooting it in higher quality is recommended.
For completeness, I'll overview some settings first.
Video Resolution
As a refresher, the video resolution is the width and the height of each individual frame. You'll generally hear 1080P, 4K, or 5K to denote the frame size. Along with this is aspect ratio. Aspect Ratio is just the ratio between the width and the height. Old TV was 4:3 aspect ratio and flat screens use a 16:9 aspect ratio.
With all the vertical (portrait) video going on social media, GoPro introduced a taller aspect ratio of 8:7. This ratio is great for reframing in your editing software. Meaning it is easy to crop both a horizontal video and a vertical video from the same camera. So, if you want to punch out a vertical video from your horizontally mounted camera, use and 8:7 aspect ratio.
The table below shows the various resolutions and aspect ratios the GoPro handles. Abe's blog is a must read for more information.

HERO11 Resolutions - Abe Kislivetz
Frames Per Second (FPS)
Frames per second is how many images per second are captured. A higher fps enables you to slow down the footage more when editing and makes high speed motion appear smoother. The trade off is the video file either becomes bigger or you'll get more image degradation due to compression.
Sharpness
The high sharpness setting on most GoPro Cameras is fairly bad. You'll end up seeing a white or gray glow around people on a blue sky background. I suggest keeping this down. The Medium default works well.
Color
- GoPro Color - Overly saturated. May look good for some social media
- Natural - A good, consistent setting.
- Flat - Generally for someone who will be color correcting in their editing software.
- Log - Unprocessed video. You have to perform color treatment in post. This setting needs to be enabled in Profile to use.
Recommended Settings
| Debriefing/ general usage | Post Processing / High Quality | ||
| Profiles (H12) | Standard | Standard / Log | Log - expert color mode |
| Resolution | 1080P | 4K 8:7 or 5.3K 16:9 |
Although 5.3K exists, there is not 60fps when using 8:7 aspect ratio 8:7 aspect ratio gives us the option to punch out vertical video so I use this when I will be editing the footage. |
| FPS | 60 | 60 | Higher FPS if you want super slow motion |
| Lens | Linear | Wide | Dependent upon your flying ability |
| HyperSmooth | On | On | AutoBoost is not good for skydiving |
| Duration | No Limit | No Limit | |
| Schedule Capture | Off | Off | |
| Timer | Off | Off | |
| ProTune | |||
| 10-Bit | Off | On | More bits of data per pixel |
| Bit Rate | Standard | High | High contains more data per second. Will produce a larger file. |
| Shutter | Auto | Auto | |
| EV Comp | 0 | 0 | -0.5 if subject is blown out |
| ISO Min | 100 | 100 | |
| ISO Max | 800 | 800 | |
| White Balance | Auto | Auto | |
| Sharpness | Medium | Medium to Low | |
| Color | Natural | Flat / Natural | |
| Raw Audio | Off | Off | |
| Wind | Auto | Auto |
Photo / Stills Mode
Still mode / Photo every second is not a default anymore on the camera. This is how you enable the mode.
On the Camera:
- Change default Preset in General Settings to Last Used Timelapse if you plan on using this every time.
- Switch to Time Lapse mode. Not Photo mode.
- Press the Preset in the bottom center.
- Scroll up and choose "+ Create New Preset"
- Choose Time Lapse
- Format to Photo
- Lens to Wide
- Output to Standard
- Interval to 0.5s (Only can choose 5sec with RAW photo)
- and the reset your personal preference
- Then press the checkmark and choose your preset's name.
I use the name Air
Conclusion
The GoPro Camera is a tool. Like any tool, there are many, often unique, uses for them. View these settings as a starting point and explore out from them. Try it on the ground first.
Enjoy the journey!